Creating a Custom Theme Using Publish
The Swift community is fortunate to have many knowledgeable and generous members, one of whom is John Sundell, the author of the Publish static site generator.
This very site is generated using Publish.
As of March 2024, this site is published using the Obsidian Digital Garden Plugin.
This article will expand on the instructions provided for creating your own theme, and cover:
- duplicating the provided Foundation theme as a starting point for creating your own theme
- adjusting the presentation of content using CSS
- modifying site content using the domain-specific language (DSL) of Plot
- enabling Splash and its Swift syntax highlighting plugin
If you prefer video, this tutorial by Kilo Loco is an excellent option.
Getting started
If you are reading this post and wondering how to even begin using Publish to generate a site, I found this post by Perttu Lähteenlahti very helpful.
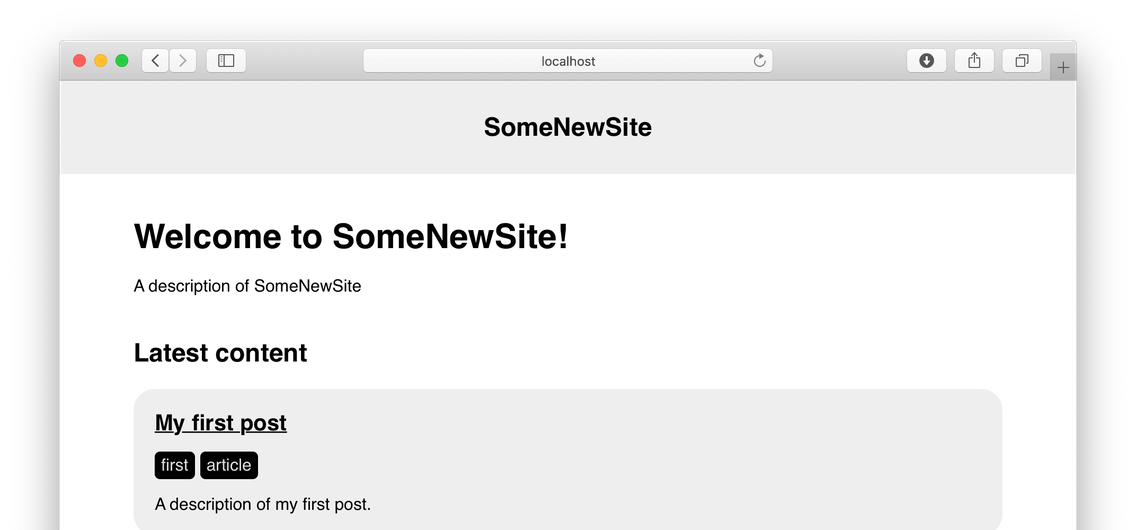
Let's assume you have followed Perttu's instructions, that you created a site called SomeNewSite, and you are viewing the result generated by Publish:
Duplicating the Foundation Theme
In the SomeNewSite folder, open Package.swift using Xcode.
In Xcode, open Sources → SomeNewSite → main.swift.
The following should catch your eye:
// This will generate your website using the built-in Foundation theme:
try SomeNewSite().publish(withTheme: .foundation)
Command-clicking on the .foundation argument and choosing Jump to Definition reveals that the Theme+Foundation.swift file defines the Foundation theme. Progress!
It is not advisable to modify the provided theme as future updates to Publish will create conflicts with any changes you make.
It is better to duplicate the provided theme. You can then use the duplicate as a starting point for defining the content and presentation of your website.
Before leaving the Theme+Foundation.swift file, highlight and copy all its code to your clipboard: Command-A and then Command-C will do the trick.
Say your new theme will be named Basic. Create a file named Theme+Basic.swift in the Sources → SomeNewSite folder:
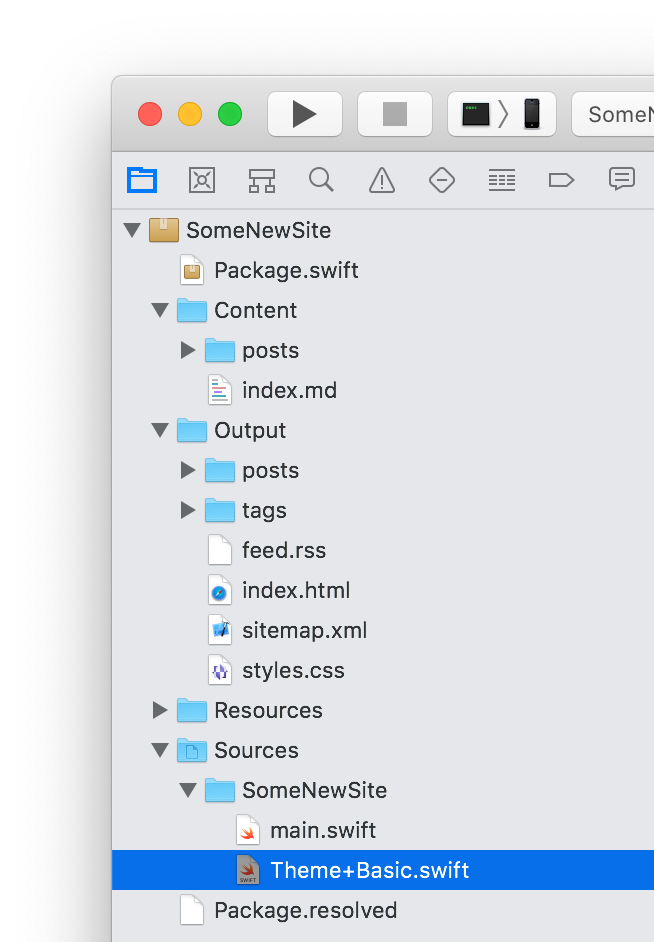
Place your cursor in that newly created file and replace the existing code: Command-A then Command-V.
At this point you may wish to update the comment at the top of the Theme+Basic.swift file:
//
//  Theme+Basic.swift
//
//
//  Created by Your Name on 2020-08-13.
//
It is now necessary to import a couple of additional packages.
Above the import Plot statement, add:
import Foundation
import Publish
The Theme extension tells Publish where to find the stylesheet that will control the presentation of content. Make edits so that the Theme extension is defined as follows:
extension Theme where Site == SomeNewSite {
    /// My customized "Basic" theme.
    static var basic: Self {
        Theme(
            htmlFactory: BasicHTMLFactory(),
            resourcePaths: ["Resources/BasicTheme/styles.css"]
        )
    }
}
Next, where the FoundationHTMLFactory struct is defined:
private struct FoundationHTMLFactory<Site: Website>: HTMLFactory {
... make edits such that the code reads as follows, instead:
private struct BasicHTMLFactory: HTMLFactory {
If you now switch to the Terminal application, and type publish run in the SomeNewSite folder, the compiler will throw many errors. For example:
error: reference to invalid associated type 'Site' of type 'BasicHTMLFactory'
    func makeSectionHTML(for section: Section<Site>,
                                              ^
By switching to Xcode, command-clicking on the Site type (line 23, for example), and choosing Jump to Definition, you will see:
public protocol HTMLFactory {
    /// The website that the factory is for. Generic constraints may be
    /// applied to this type to require that a website fulfills certain
    /// requirements in order to use this factory.
    associatedtype Site: Website

    ...

}
In main.swift a struct named SomeNewSite that conforms to the protocol Website is defined.
And there is the solution1 – in Theme+Basic.swift all references to the Site type parameter in the BasicHTMLFactory struct must be replaced with references to the SomeNewSite type.
Do this now in Xcode. Be sure to use a case-sensitive find and replace operation, but be careful not to acccidentially replace the Site text in the extension of the Theme type (probably on or around line 12).
You are almost done! 😅
Return to main.swift. Tell the compiler to build your site using the new theme. Update the final two lines of code to read:
// Generate the website using my customized Basic theme
try SomeNewSite().publish(withTheme: .basic)
Switch to the Terminal application. Type publish run in the SomeNewSite folder. The Swift code will now compile, but the site will not generate, because Publish cannot find the stylesheet:
Fatal error: Error raised at top level: Publish encountered an error:
[step] Generate HTML
[path] Resources/BasicTheme/styles.css
[info] Failed to copy theme resource
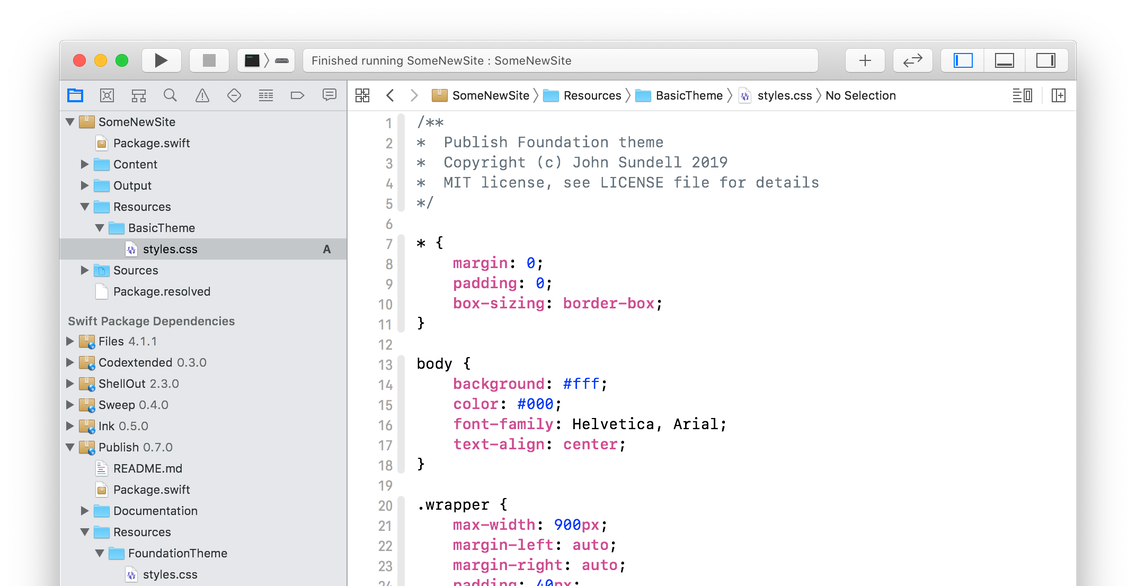
To correct this, in your Resources folder, create a new folder named BasicTheme.
Inside that folder, create a new file named styles.css.
Expand the Publish package in Xcode, then navigate to the Resources → FoundationTheme folder.
From the FoundationTheme folder, copy and paste the entire conents of the styles.css file into your newly created CSS file in the BasicTheme folder.
Here is what things should generally look like at this point:
You may now wish to update the comment at the top of your new stylesheet file.
Switch back to the Terminal application. Type publish run in the SomeNewSite folder. This time the site should generate successfully.
If you load the site, you should once again see the following:

It is perhaps a bit deflating to do all that work to get the same result, but now the site is being generated by your own custom theme. It gets easier from here!
Adjusting Presentation Using CSS
Now that the Basic theme is set up, adjusting the presentation of site content using CSS is straightforward.
Test that this is working by adjusting the background color in styles.css inside the BasicTheme folder to display in orange:
body {
    background: orange;
    color: hsl(0,0%,0%);
    font-family: Helvetica, Arial;
    text-align: center;
}
Note that if your computer is running in dark mode, you'd need to change this section of the styles.css file instead:
@media (prefers-color-scheme: dark) {
    body {
        background-color: orange;
    }
    ...
}
Whenever you make an edit to the stylesheet, the website must be rebuilt. In the SomeNewSite folder, type publish run.
Now reload the page in your web browser.
You should see that the background of the page is now bright orange.
Beware: browsers will, whenever possible, load files from a cache rather than from the server. Since you are trying to test a change to your stylesheet, it's important that you are not reloading from a cache of the original stylesheet.
In Safari, Option-Command-R triggers the Reload Page from Origin command, which should ignore any cached files and instead, as suggested by the name, reload files from the server. In Chrome, I believe the equivalent command is Shift-Command-R.
It is helpful to enable the Develop menu in Safari. To do this, open Safari Preferences, and on the Advanced tab, enable the Show Develop menu in menu bar option.
From the Develop menu, Option-Command-E to trigger the Empty Caches command can be useful.
For further reading, if you are new to web development, learning how to inspect web page elements is recommended. This tutorial on CSS selectors may also be helpful.
If you've made a change to a CSS file, but do not see it reflected on your page, do not worry. This happened to me dozens of times. Ask yourself these questions:
- Did I save changes to the CSS file?
- Did I remember to issue the
publish runcommand to regenerate the website? - Did I reload the page ignoring cached files? (see keyboard shortcuts above)
- Have I emptied the browser cache? (see keyboard shortcut above)
- Am I using the correct CSS selectors to target an element? (see suggested further reading above)
Modifying Content Using Plot
Plot defines a domain-specific language (DSL) for writing HTML in Publish. This means you can safely write HTML using Swift. It's worth reading the documentation – it is extensive and well written.
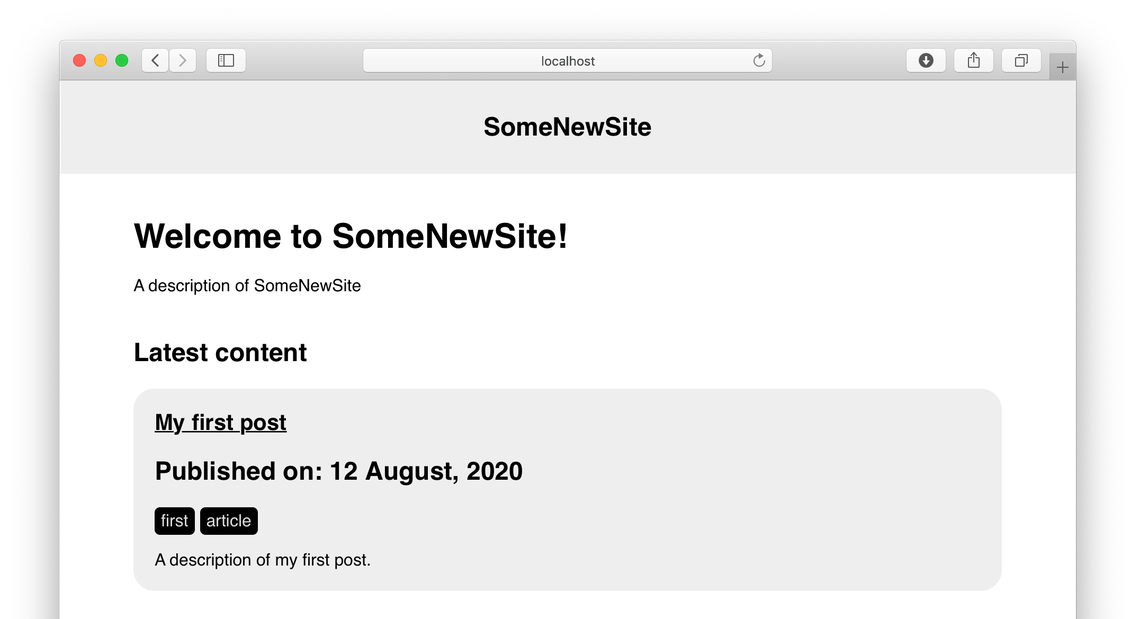
Let's review a quick example here. Say that you wish to add the date of a published article to the item list on the main page, so that the page will look like this2:
Open the Theme+Basic.swift file in Xcode, and navigate to the itemList method.
Add a call to the h2 method just below where the h1 method is invoked:
static func itemList<T: Website>(for items: [Item<T>], on site: T) -> Node {
	return .ul(
		.class("item-list"),
		.forEach(items) { item in
			.li(.article(
				.h1(.a(
					.href(item.path),
					.text(item.title)
				)),
				.h2(.text("Published on: \(item.date)")),
				.tagList(for: item, on: site),
				.p(.text(item.description))
			))
		}
	)
}
That new code retrieves the date of the current item and positions it just below a link to the item.
If you regenerate the site using the publish run command, and reload it in your browser, you should see something like this:
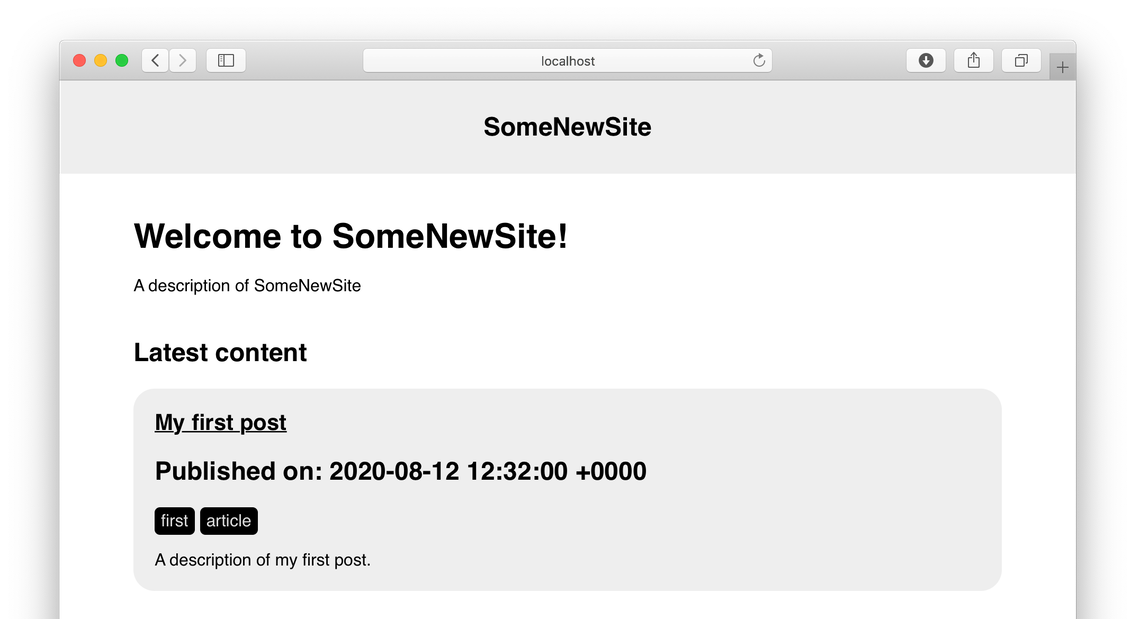
The date is not nicely formatted.
The wonderful part of building a website using Swift is that you can apply all your existing knowledge to the endeavour.
Add a quick extension to the Date type at the top of Theme+Basic.swift:
extension Date {
    var asText: String {
        let formatter = DateFormatter()
        formatter.dateFormat = "dd MMMM, yyyy"
        let dateString = formatter.string(from: self)
        return dateString
    }
}
... and a slight change to the itemList method:
.h2(.text("Published on: \(item.date.asText)")),
... and you should find that the date is now better formatted.
I often forget the rules for formatting dates in Swift; this site is a useful reference.
To learn more about how to build site content using the Plot DSL, do have a look at Kilo Loco's video.
To see the complete list of HTML elements that the Plot DSL API supports, this page is helpful.
Remember, Plot is extensible – you can define your own components, and more.
Enabling Splash for Swift Syntax Highlighting
Being able to share nicely highlighted excerpts of Swift code on this website was the motivating factor for my own move to using the Publish static site generator.
To get started, per John Sundell's instructions, modify Package.swift to read as follows:
// swift-tools-version:5.2

import PackageDescription

let package = Package(
    name: "SomeNewSite",
    products: [
        .executable(
            name: "SomeNewSite",
            targets: ["SomeNewSite"]
        )
    ],
    dependencies: [
        .package(name: "Publish", url: "https://github.com/johnsundell/publish.git", from: "0.6.0"),
        .package(name: "SplashPublishPlugin", url: "https://github.com/johnsundell/splashpublishplugin", from: "0.1.0")
    ],
    targets: [
        .target(
            name: "SomeNewSite",
            dependencies: ["Publish", "SplashPublishPlugin"]
        )
    ]
)
Next, changes to main.swift are required.
Add this line to the end of the list of import statements:
import SplashPublishPlugin
Modifications to the final line of code are required. Your site is currently being generated with the default pipeline provided by Publish:
// Generate the website using my customized Basic theme
try SomeNewSite().publish(withTheme: .basic)
To use Splash, a customized pipeline for website generation is required.
Modify the code to read as follows:
try SomeNewSite().publish(using: [
  .copyResources(),
  .installPlugin(.splash(withClassPrefix: "")),
  .addMarkdownFiles(),
  .sortItems(by: \.date, order: .descending),
  .generateHTML(withTheme: .basic),
  .unwrap(RSSFeedConfiguration.default) { config in
      .generateRSSFeed(
        including: [.posts],
          config: config
      )
  },
  .generateSiteMap()
])
That custom publishing pipeline mimics the default pipeline, but includes Splash.
Now, navigate to the Content → posts folder in Xcode.
Modify first-post.md, below the metadata section, to read as follows:
# My first post

My first post's text.

```
var i = 10
while i > 0 {
    print("\(i)...")
    i -= 1
}
print("Blast off!")
```
Now invoke publish run to regenerate your site. From the main page, follow the link to read the post.
You might be disappointed to see that the Swift code is not syntax-highlighted.
Inspect an element near the start of the Swift code block.
You should see something like this:
<span class="keyword">var</span>
In other words, what's happening is that Splash wraps Swift code in <span> tags that specify certain CSS classes.
To see color-highlighted code, CSS is required.
Just below is CSS that will provide colors according to John Sundell's theme3. Copy and paste this at the bottom of your styles.css file in the BasicTheme folder4:
pre code {
    color: hsl(180,12%,70%);
}

.preprocessing {
    color: hsl(45,100%,36%);
}

.comment {
    color: hsl(195,16%,50%);
}

.number {
    color: hsl(11,65%,60%);
}

.call {
    color: hsl(209,77%,55%);
}

.property {
    color: hsl(174,68%,40%);
}

.keyword {
    color: hsl(331,79%,57%);
}

.dotAccess {
    color: hsl(71,100%,35%);
}

.type {
    color: hsl(241,41%,65%);
}

.string {
    color: hsl(19,96%,55%);
}
Regenerate your site, and reload the post. You should now see that the Swift code is syntax-highlighted with color.
You can customize the colors as desired, of course.
If you are looking to mimic colors from existing themes, I think you will find the Classic Color Meter app to be very useful. I purchased Classic Color Meter and used it extensively while developing this site's look and feel.
The Paletton site is also excellent.
Conclusion
Whew! 😅
I hope this article has helped you blast off with Publish. 🚀
Please let me know how this goes for you.
I'd love to keep this article current, so if something doesn't work for you, please let me know.
Good luck!
- This may not be the most correct solution; I welcome suggestions for a better approach.^
- I've removed the orange background from the last section of this tutorial.^
- On Friday, August 14, 2020, the destination for this link was updated to point to a stylesheet designed specifically for presenting code with Splash, as opposed to linking to an Xcode theme with John Sundell's colors.^
- On March 29, 2024, CSS color codes in hexadecimal were converted to their HSL equivalents.^